Editing & Workflow
How to Edit Concert Photos for Best Results
Concert photography captures one of the most visually complex environments in the craft — wild stage lighting, smoke, rapid movement, and extreme contrast be...
Concert photography captures one of the most visually complex environments in the craft — wild stage lighting, smoke, rapid movement, and extreme contrast between bright spotlights and deep shadow. Getting a strong image straight out of the camera is an achievement in itself. But thoughtful post-processing is what transforms a technically challenging raw file into a gallery-worthy shot that conveys the energy of the performance.

Start with a Strong Foundation
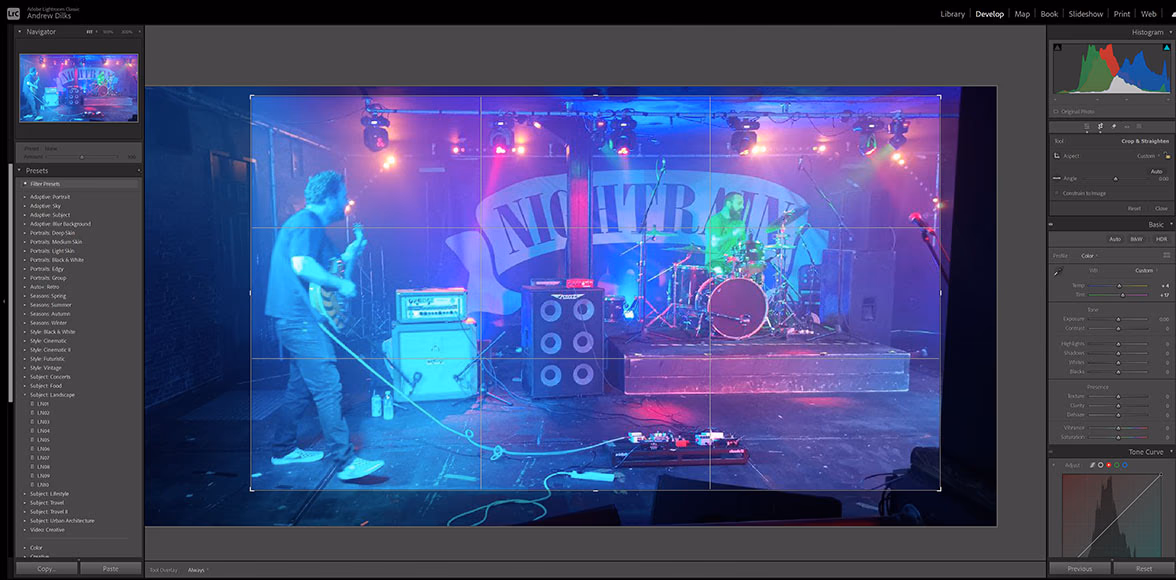
Before diving into intricate exposure adjustments, start with fundamental corrections. Crop to remove distracting elements at the edges of the frame — stage monitors, a stray elbow, or a half-visible security guard. Straighten the horizon line so the stage and any structural rigging sit level. A slightly tilted frame in an otherwise dramatic shot pulls the viewer out of the moment.
Managing Exposure and Dynamic Range
Concert lighting is extreme by nature. The lead singer's face might be blazing under a spotlight while the drummer is lost in near-total darkness. Addressing this contrast begins with precise exposure corrections:
- Pull back your highlights (typically -30 to -60 in Lightroom) to recover detail in brightly lit faces, arms, or metallic stage fixtures.
- Lift the shadows carefully to reveal detail in the darker areas without introducing ugly digital noise. A gray, washed-out look is a common sign of pushing the shadows slider too aggressively.
Color Correction and White Balance
Stage gels can throw wild, monochromatic color casts (deep reds, rich blues, aggressive purples) across your frame. While part of the atmosphere, these can make skin tones look unnatural. Use Lightroom's Targeted Adjustment or Color Mixer tools to gently dial back specific color channels. Reduce the saturation of aggressive reds and magentas only on skin tone areas while preserving the atmosphere of the lighting on the rest of the stage.
Black-and-white conversion is also a powerful backup when a heavily gelled shot simply refuses to produce flattering color — it strips away chromatic chaos and leaves you with pure dramatic contrast and texture.
Cropping and Lens Corrections
Crop tight and deliberately. A performer's eyes filled with emotion, fingers curling around a microphone, or a drummer's flying sweat create more visual impact than a wide, cluttered stage shot. Enable your editing software's Lens Corrections profile to remove distortion and chromatic aberration along the edges, especially if you were shooting wide open.
Adding Artistic Finishes
Concert photography rewards subtle creative flourishes. A gentle vignette (-5 to -12) darkens the edges just enough to guide the viewer's eye toward the performer. A slight boost of texture and clarity (+10 to +20) makes facial expressions, instruments, and stage gear details crisp without crossing into an overly harsh look.
When sharpening the final export, apply masking in the Detail panel to protect smooth skin areas. Sharpening a singer's face aggressively while keeping their background soft results in an unnatural, "plastic" look.
Practical Tips for Concert Editing
- Shoot RAW. This is non-negotiable. JPEG files bake in white balance and compression that severely limit your latitude to recover blown highlights or deep shadow tones under concert lighting.
- Use noise reduction selectively. ISO values at concerts routinely hit 3200, 6400, or higher. AI-powered noise reduction tools (in Lightroom or dedicated plugins) can clean up grainy backgrounds while preserving facial detail.
- Batch-edit for consistency. A concert gallery looks professional when color and exposure feel uniform across the set. Edit one well-exposed hero shot, sync those settings across the entire gallery, and then make individual micro-adjustments.
Final Thoughts
Editing concert photos is a balance between preserving the raw, chaotic energy of a live performance and delivering a clean, emotionally impactful image. Focus on pulling back harsh highlights, managing harsh stage-gel color casts, and tightening every crop. The goal is to make the viewer feel like they were standing right at the barricade.
FAQ
Why do my concert photos look so grainy? Concert venues are dark, forcing your camera to ISO values of 3200 or higher, which introduces digital noise. Shooting RAW allows AI noise-reduction tools to clean up the image far better than a compressed JPEG file.
How do I fix skin tones ruined by red or blue stage lights? Use HSL or Color Mixer tools to target and desaturate the specific red, blue, or magenta channels in your subject's face. If the color cast is too extreme to correct naturally, converting the image to black and white often produces a dramatic, clean alternative.
Should I edit concert photos bright and airy or dark and moody? Match the mood of the performance. A high-energy rock band suits high contrast and clarity. A solo acoustic singer-songwriter suits softer, warmer edits. Let the artist's own energy on stage guide your creative post-processing decisions.